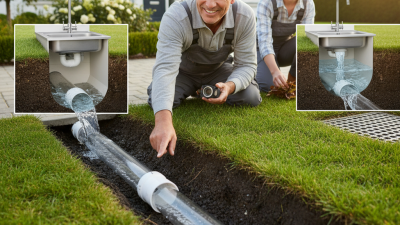
Choosing the right drainage pipe is rarely a simple matter of comparing prices. Soil conditions, expected flow, installation depth, traffic loads, and local climate can change the decision completely. A pipe beneath a garden path faces different pressures from one installed beneath a busy access road. Small details matter.
Dr. David Butler, a respected urban drainage researcher and author, states, “Urban drainage must protect public health and the environment.” That principle should guide every drainage pipe selection. A suitable pipe must carry water efficiently, resist crushing, tolerate chemicals, and maintain dependable joints. PVC, HDPE, concrete, and clay each offer useful strengths. None is perfect.
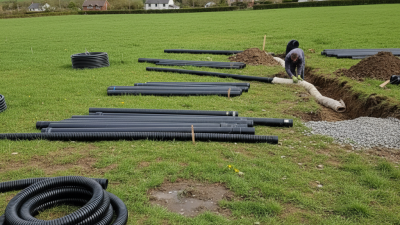
Experienced contractors often inspect the trench before approving the product. They check groundwater, soil movement, bedding quality, and possible root intrusion. They also examine whether workers can transport and connect long pipe sections safely. A theoretically excellent material may fail when installation is rushed. That uncomfortable point deserves attention.
This guide explains how to match a drainage pipe with the project’s actual demands. It considers hydraulic capacity, structural strength, durability, maintenance, and total cost. It also questions a common assumption: the cheapest pipe is not always the most economical choice. A blocked line, collapsed section, or leaking joint can quickly erase the original savings. Reliable design requires evidence, careful measurements, and honest reflection about site limitations. Even experienced professionals can overlook one variable. That is why selection should combine manufacturer data, engineering judgment, and practical field knowledge.
How to Choose the Right Drainage Pipe for Your Project?
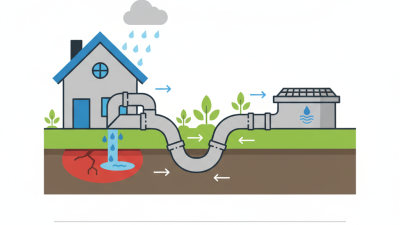
Before choosing a drainage pipe, define what the system must carry and where water will go. Start with a site walk, not a catalogue. Mark roof outlets, paved areas, low points, existing channels, and nearby structures. Measure the catchment area and observe the ground after rain. A ten-minute inspection can reveal water moving toward a foundation. That detail matters.
Estimate peak flow from rainfall intensity, surface area, and runoff conditions. Local weather records and project standards provide a sound starting point. Soil also changes the answer. Clay may need faster collection and controlled discharge, while sandy ground may accept infiltration. Check the slope with a level or survey equipment. A shallow grade can leave sediment inside the pipe. Too much slope can cause erosion at the outlet. It sounds simple, but field measurements are often incomplete.
Define the pipe’s expected load, temperature range, maintenance access, and service life. A pipe beneath a driveway needs different structural capacity than one in a planted bed. Include inspection chambers where blockages are likely. Keep outlet protection in the design. One overlooked detail can undo good calculations. Recheck assumptions with a qualified drainage engineer and confirm local requirements before installation.
| Project Requirement | Key Design Question | Typical Design Input | Suitable Pipe Characteristics | Selection Guidance |
|---|---|---|---|---|
| Drainage Type | What fluid will the pipe convey? | Stormwater, sanitary wastewater, groundwater, agricultural drainage, or industrial discharge | A pipe material and joint system compatible with the fluid, temperature, and expected contaminants | Confirm chemical resistance and local approval requirements before final specification. |
| Required Flow Capacity | What peak flow must the system carry? | Design flow in L/s or m³/s, including rainfall intensity, catchment area, runoff coefficient, and safety allowance | An internal diameter and hydraulic roughness that provide the required capacity without excessive surcharge | Size the pipe using an accepted hydraulic method, such as the Manning equation for gravity drainage. |
| Pipe Diameter | What diameter is needed for the calculated flow? | Calculated flow, available slope, allowable flow depth, and minimum cleaning access | A nominal size that meets capacity and maintenance requirements | Do not select a diameter from flow alone; verify velocity, depth, slope, and access conditions. |
| Available Slope | Can gravity flow be maintained along the route? | Longitudinal grade, invert levels, terrain, groundwater level, and connection points | A pipe diameter and internal surface that maintain self-cleansing flow without causing excessive velocity | Where gravity flow is insufficient, assess a deeper alignment, lifting station, or pumped system. |
| Installation Location | Will the pipe be buried, exposed, or installed underwater? | Trench depth, soil condition, groundwater, installation method, and environmental exposure | A pipe with suitable stiffness, pressure rating, UV resistance, or buoyancy control for the site | Consider trench support, bedding, backfill quality, and flotation protection where applicable. |
| External Loads | What loads will act on the pipe? | Soil cover, traffic loading, construction loads, groundwater, and potential settlement | A structural class or wall stiffness appropriate for flexible pipes, or adequate strength for rigid pipes | Check the complete pipe-soil system rather than relying only on nominal wall thickness. |
| Joint Performance | Must the system resist infiltration, exfiltration, or pressure? | Groundwater level, operating pressure, soil movement, and required leak-tightness | Watertight, gasketed, fused, restrained, or mechanically sealed joints as required | Match the joint type to the system pressure and movement risk; specify testing requirements. |
| Maintenance Access | How will blockages and sediment be removed? | Cleaning equipment, access spacing, expected sediment load, and inspection method | Smooth-bore pipe, accessible manholes, inspection chambers, and compatible cleaning methods | Provide access at direction changes, junctions, grade changes, and other maintenance points. |
| Material Compatibility | Will the material remain durable in the site environment? | Soil pH, salts, chemicals, abrasion, temperature, sunlight, and biological activity | Corrosion-resistant, abrasion-resistant, chemically compatible, and UV-stable construction where needed | Evaluate the pipe, fittings, seals, and protective coatings as one complete system. |
| Regulatory Requirements | Which codes and standards govern the installation? | Local drainage codes, environmental permits, structural design rules, and testing procedures | Pipe, fittings, joints, and installation practices certified or accepted for the intended application | Verify requirements with the project engineer or authority having jurisdiction before procurement. |
Practical check: Final pipe selection should satisfy hydraulic capacity, structural loading, joint performance, durability, installation conditions, maintenance access, and applicable local requirements.